
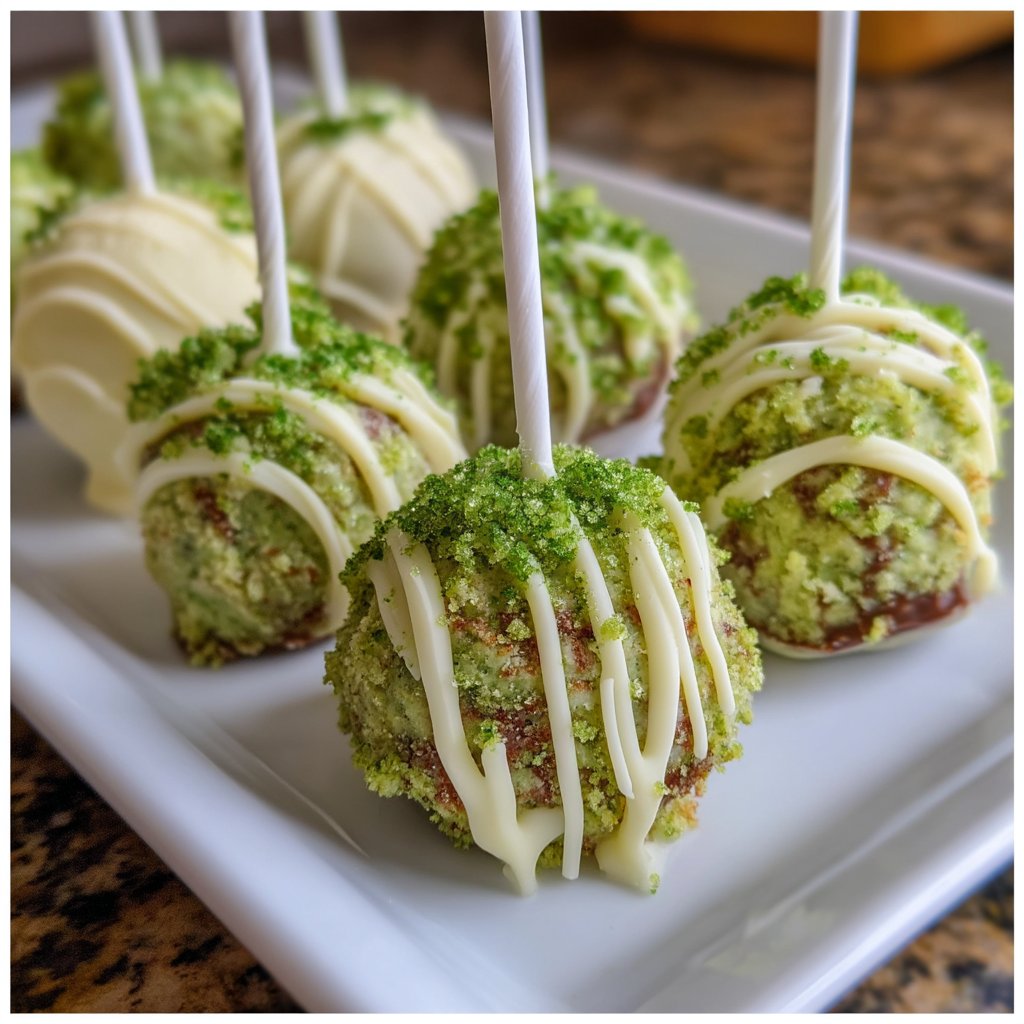
I still remember the first time I popped one of these into my mouth at a neighborhood bake sale—the burst of color, the soft cake center, and that wink of white chocolate glaze that made everyone smile. Green Velvet Cake Pops have that small-but-memorable magic that turns a simple kitchen afternoon into a reason to gather family, coax kids into helping, and celebrate tiny victories like a perfectly round pop. They brighten up holidays, school parties, and random Tuesdays when a little sweetness can change the whole mood.
I’m a former Atlanta caterer who turned my kitchen into a home studio and blog. I’ve spent over 16 years turning simple ingredients into dishes that bring people together, and those years taught me how small details—like the right crumb texture—make or break a treat. As a mom of two and a wife of more than twenty years, my kitchen lives at the center of our household storytelling. I follow recipes with an eye for practicality and a heart for creativity, and I love nudging readers to add their own twist. If you’re wondering what goes inside the best cake-pop centers, check my deep-dive on what goes inside a cake pop to see the building blocks I use for consistency and flavor.
Why you’ll love this dish
Green Velvet Cake Pops feel like a little celebration on a stick. They carry the familiarity of a classic red velvet but with a playful, verdant color that invites seasonal creativity—think St. Patrick’s Day, spring brunches, or a green-themed baby shower. The texture relies on the right balance between moist crumbs and creamy frosting; too dry and the pop crumbles, too wet and it won’t hold its shape. Over my years catering in Atlanta, I learned to aim for a cake center that compresses easily yet bounces back when formed into a ball. That makes these Green Velvet Cake Pops hold together in transport and taste fresh bite after bite.
I add flavor notes that echo back to soulful southern baking: just a hint of vanilla, a touch of tang from buttermilk, and the forgiving sweetness of a buttercream that keeps everything cohesive without overpowering the green velvet flavor. These pops give you decorating freedom, too—dip them in white chocolate and dress them with sprinkles, edible glitter, or drizzles of colored candy coating. If you’re curious about mastering shapes and getting those perfect spheres, my guide on how to make perfectly round cake pops shares the techniques I use for catering clients and family parties alike. With a little patience and these tips, Green Velvet Cake Pops become an easy, crowd-pleasing project you’ll return to again and again.
How to prepare Green Velvet Cake Pops
When I teach people how to make Green Velvet Cake Pops in workshops, I break the process into three friendly parts: prepare the cake crumbs, bind them with frosting, and dip them into chocolate. That simple structure keeps the project approachable, especially if you’re wrangling little helpers. Start with cooled cake that you either baked from scratch or used from a box—either way, cool completely so the crumbs won’t sog when you mix them with frosting. The ideal crumb should form a soft, moldable mixture that holds a shape without dripping or feeling greasy.
Next, flavor balance matters. If your frosting is ultra-sweet, reduce the quantity a touch; if your cake is dense, add a tablespoon of milk to loosen the mixture. Roll the centers into consistent sizes—about a tablespoon each—for even baking and dipping. Chill them on a baking sheet while you melt the white chocolate. For dipping, warm the chocolate gradually and use a dipping tool or fork to let excess drip back before setting the pop down. If you want visual cues on dipping technique, my post about the secret to dipping cake pops gives step-by-step tips I use after large catering orders to keep finishes flawless. With these steps, your Green Velvet Cake Pops will look professional and taste like a treat from a trusted bakery.
Ingredients
-
Green velvet cake crumbs
-
Frosting
-
White chocolate
Instructions
-
Mix the cake crumbs and frosting together until well combined.
-
Form the mixture into small balls, about the size of a tablespoon.
-
Dip each ball into the melted white chocolate, ensuring it’s fully coated, and place on a baking sheet to set.
Serving ideas
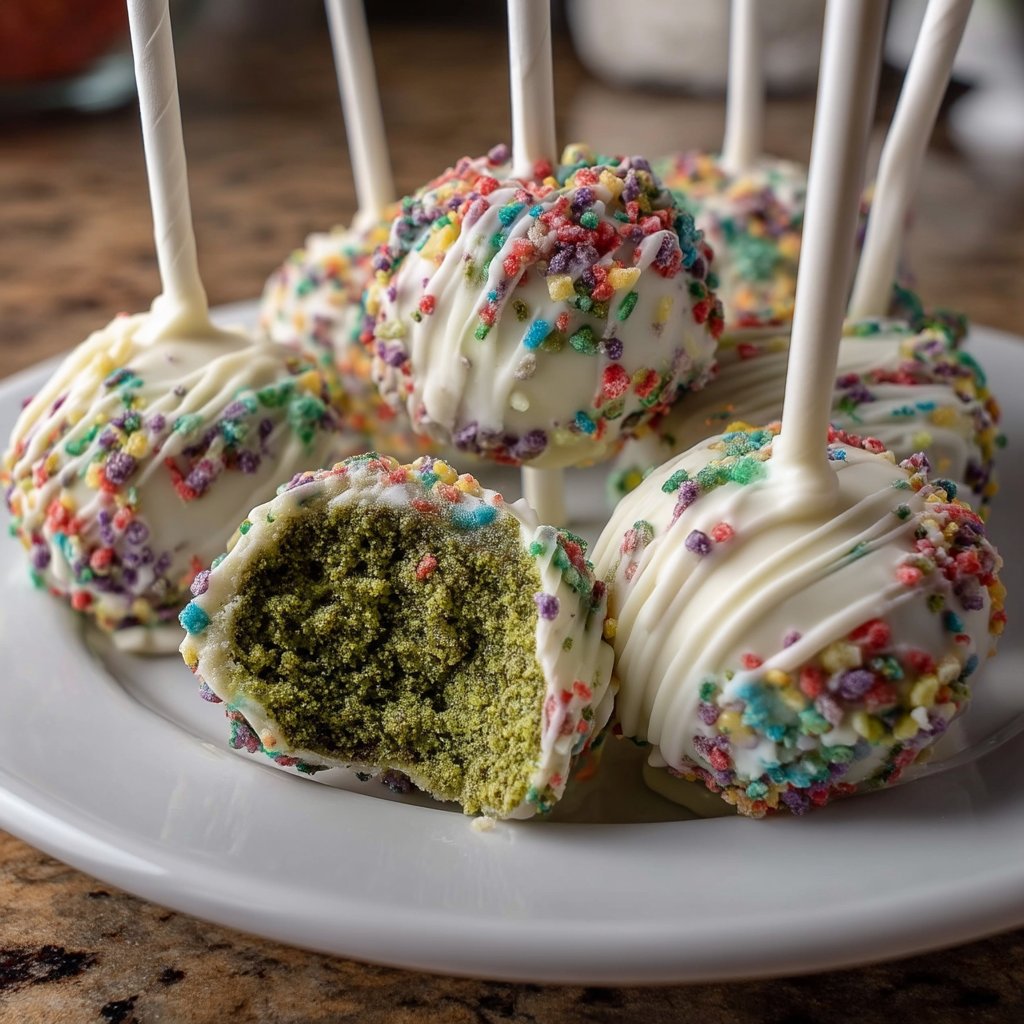
Green Velvet Cake Pops shine as party bites and as charming additions to dessert tables. Arrange them upright in a decorated foam block covered with tissue, or lay them flat on a platter with small labels describing flavors. Pair them with neutral treats—a platter of fresh fruit, simple sugar cookies, or a few cupcakes—so the green pops stay the star. For a brunch, serve mini jars of flavored cream for dipping alongside the pops: lemon whip, salted caramel drizzle, or a thin espresso glaze all contrast beautifully with the mild sweetness of the Green Velvet Cake Pops.
Think about temperature and timing when planning service. These pops hold best at cool room temperature for a few hours; avoid leaving them in direct sun during outdoor events. For kid-friendly gatherings, give children mini decorating stations with sprinkles and edible markers so they can personalize their Green Velvet Cake Pops while learning hands-on skills in the kitchen. If you want a fun twist, turn them into a dessert grazing board—cluster several Green Velvet Cake Pops with chocolate truffles, candied nuts, and small pastries for a colorful and playful display. The visual pop and bite-sized format make them irresistible and perfect for reminding guests of how food brings people together.
How to store it properly
Proper storage keeps your Green Velvet Cake Pops tasting fresh and looking good. For short-term storage, place them in a single layer in an airtight container and keep them in the refrigerator—this helps set the coating and prevents sweating. If you need to stack, separate layers with parchment paper to protect the chocolate finish. Refrigerated pops will hold well for up to a week, though they taste best within three to four days for peak texture and freshness.
For longer storage, you can freeze the cake-pop centers before dipping to lock in moisture and shape. After forming the balls, flash-freeze them on a baking sheet until firm, then move to a sealed container or freezer bag for up to three months. When you’re ready to finish, dip the frozen centers directly into gently warmed white chocolate; dipping from frozen gives you a crisp shell and an extra-silky interior. Thaw the finished pops in the fridge for several hours before serving to reduce condensation. These methods help you prepare large batches ahead of time for parties, school events, or cafés without sacrificing quality—an essential trick I used during busy catering seasons in Atlanta.
Emma’s Kitchen Tips
I always encourage home cooks to make this recipe their own. Keep a small notebook—Jot down what you add: a splash more vanilla, a teaspoon of cocoa, or a pinch of espresso. Little tweaks yield big memories. In the kitchen, work with a consistent scoop to size each Green Velvet Cake Pop. Uniformity saves time during dipping and makes for an attractive presentation. If you find the mixture too sticky, slide it into the freezer for 10–15 minutes before rolling; it firms up and becomes easier to handle.
When melting white chocolate, go low and slow. Use a double boiler or short bursts in the microwave, stirring between each interval to prevent scorching. If your coating looks grainy, add a teaspoon of vegetable oil to smooth it—this helps when you need a glossy finish during a busy service. For edible color contrast, use a small offset spatula to swirl colored candy melts over the dried white chocolate; it creates a streaked, artisanal look. For ideas to pair or repurpose leftovers into other treats, explore creative recipes that echo the green theme—you might find synergy between Green Velvet Cake Pops and other green-inspired breakfasts or desserts like the playful green pancake ideas I love to make for weekend family breakfasts.
Make it your own
Customization makes these pops feel personal. Swap in flavored frosting—cream cheese for tang, or a citrus buttercream for brightness—to change the taste profile. Add mix-ins to the cake crumb like tiny white chocolate chips or finely chopped nuts for texture. If you want to elevate presentation, use edible gold leaf or metallic sugar on a few pops for a sophisticated touch that still delights kids and adults alike. For themed events, coordinate the coating with colored ribbons and labels or even edible printed wrappers for a custom look.
For dietary tweaks, try using dairy-free frosting and a vegan white chocolate coating to accommodate guests. You can also experiment with natural colorants—spinach or matcha powder yield green hues without artificial dyes, though they alter flavor slightly. If you’re catering for a large group, set up an assembly line: crumble, bind, roll, chill, and dip. Label trays with dates and flavors to keep service organized. These small adjustments help you scale the recipe while keeping the playfulness that makes Green Velvet Cake Pops a family favorite.
Frequently asked questions Write at least three FAQs with expanded answers.
Q: How do I prevent my Green Velvet Cake Pops from falling off the stick?
A: Start with the right-sized center: about a tablespoon of mixture holds well. After forming balls, chill them until firm—this helps the stick anchor. Dip the end of the stick into melted chocolate before inserting it into the ball, then dip the whole pop after the stick is secure. If the pop still slides, refrigerate for a few minutes between insertions and dipping; this creates a sturdier bond.
Q: Can I make Green Velvet Cake Pops ahead of time?
A: Yes. You can form the centers and freeze them for up to three months before dipping. Store finished pops refrigerated for up to a week; if you need longer storage, freeze the dipped pops in a single layer and then transfer to an airtight container. Thaw in the refrigerator to minimize condensation, and avoid room-temperature thawing to keep the coating crisp.
Q: What’s the best way to get smooth white chocolate coating on Green Velvet Cake Pops?
A: Melt the chocolate slowly and stir frequently. Use a double boiler or microwave in short bursts. Strain the melted chocolate if lumps form. For a shinier finish, add a teaspoon of neutral oil to the chocolate. Tap off excess coating and let the pop set vertically to avoid flattened spots. If you encounter air bubbles, stir gently and use a toothpick to pop visible bubbles immediately after dipping.
Conclusion
If you’re looking for inspiration beyond this recipe, a lovely variation and step-by-step visual guide lives at Green Cake Pops Recipe (St. Patrick’s Day Cake Pops) – Delicious …, which pairs well with the techniques and tips shared here.