
INTRODUCTION
I still remember the hush that falls over a table the moment someone cuts into a warm Chocolate Lava Cakes and a molten river of chocolate spills out. Those small ramekins have a way of turning ordinary evenings into celebrations, and they invite sharing, laughter, and the kind of spoon-to-center stealing that makes memories. They pair perfectly with quick conversations, a scoop of vanilla, or the proud smile of someone who just served something deceptively simple and wildly impressive.
I began my cooking path in Atlanta as a caterer, moving through busy kitchens and backyard parties for more than sixteen years. I learned how food connects people how a rich, gooey center can stop time at a dinner and how dependable technique creates repeatable joy. As a mom of two and a wife for over twenty years, my kitchen sits at the heart of our home. I love recipes that give you a reliable baseline and the freedom to add your twist. I approach Chocolate Lava Cakes the same way I taught my catering teams: keep the core method straightforward, respect your ingredients, and make room for creativity. If you like playful swaps, check out my take on a lighter breakfast favorite in my protein pancakes recipe, which shows how small changes can amplify flavor and texture.
This piece will walk you through why Chocolate Lava Cakes work so well, the exact steps to make them at home, and smart ways to serve, store, and tweak the recipe. I’ll share catering-tested tips that help these cakes hold up under pressure and family-tested tricks that make them a weeknight treat. Expect practical swaps, plating ideas, and answers to common questions so you feel confident the first time you pull molten centers from the oven and thrilled enough to make them again.
Why this recipe works
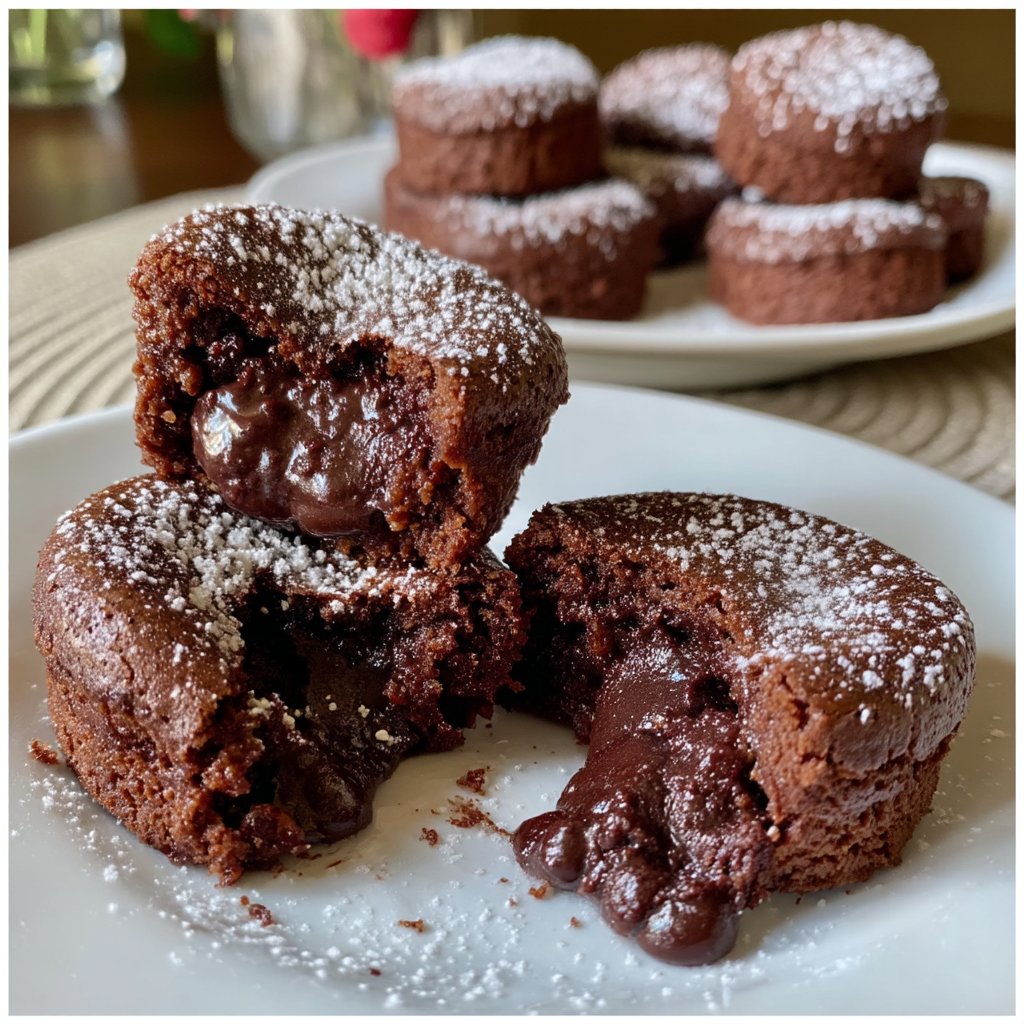
Chocolate Lava Cakes succeed because they balance two textures in a single bite: a set, cake-like exterior and a soft, flowing interior. The contrast delights the palate and gives dessert its theatrical moment. From my catering years in Atlanta, I learned to rely on a tight technique so that each ramekin performs the same way, especially when serving a crowd. The trick lies in temperature, ingredient ratios, and timing: rich melted chocolate and butter form the flavor backbone while eggs, a little sugar, and a touch of flour create structure without overbaking. That structure lets you achieve that liquid center consistently.
I keep the method intentionally simple so home cooks and busy parents can repeat it. You melt chocolate with butter until glossy, then whisk in sugar and eggs until silky smooth. A small bit of flour tames the batter into shape. The key moment happens when you bake just enough heat to set the outside while preserving the molten core. This recipe also adapts well. You can deepen the flavor by using a darker chocolate or brighten it with a dash of espresso powder. From my catering playbook, I recommend prepping ramekins ahead and chilling batter briefly if you’re juggling other dishes. If you love transforming weeknight dinners into celebrations, pair the dessert with a light espresso or an orange zest garnish for a fresh finish.
If you want other simple, make-ahead ideas to round a menu, I often link to my easy breakfasts and light sweets; for a different morning treat, try my protein pancakes recipe for inspiration on batch-cooking and flavor swaps. Overall, Chocolate Lava Cakes thrive because they let you control drama with timing and quality chocolate.
How to prepare Chocolate Lava Cakes
When I teach teams how to make Chocolate Lava Cakes, I emphasize rhythm and mise en place. Lay out your ingredients, set the oven accurately, and prepare ramekins before you melt the chocolate. Trust your senses: the batter should look glossy and pourable, and the cakes should jig slightly when they come out of the oven. If you keep the technique consistent, you will reproduce the molten centers every time, whether you bake two ramekins or a dozen.
Start by preheating the oven to a high temperature; that rapid heat jump helps the exterior set quickly. Use good-quality dark chocolate for depth; it makes the center taste indulgent without extra sugar. When melting chocolate and butter, do it gently over simmering water or in short bursts in the microwave, stirring often so the mixture stays smooth. Whisk sugar into the warm chocolate, then temper in eggs one by one so the mixture stays emulsified and glossy. Fold in just enough flour to bind overmixing or adding too much flour creates a cakier texture and reduces the molten center.
I always butter and lightly flour ramekins or use softened butter and a sugar coating to add a little crunch to the edges. Bake for a short window and test by touch: when the outside looks set and springs back lightly, they are ready. Rest briefly not long enough for the center to cool completely then invert or serve straight from the ramekin with a spoon for the classic spill. For timing, ovens vary; check at the lower end of the range and add a minute if needed.
Ingredients
-
Dark chocolate
-
Butter
-
Sugar
-
Eggs
-
Flour
Instructions
-
Melt chocolate and butter together in a bowl over simmering water or in the microwave.
-
Whisk in sugar until well combined.
-
Add eggs, one at a time, whisking until mixture is smooth.
-
Gently fold in flour until just combined.
-
Grease ramekins and pour chocolate batter into each.
-
Bake in preheated oven at 425°F for about 12 minutes.
Serving ideas
When it comes to serving Chocolate Lava Cakes, presentation amplifies the experience. These cakes look elegant on a small plate with a contrast of temperature and texture. A scoop of vanilla bean ice cream provides cool creaminess against the warm, molten center. Bright, tart components like raspberry coulis or a scattering of fresh berries cut through the richness and add color. I often dust a light sprinkling of powdered sugar and shave a little extra chocolate on top for an attractive finish that feels effortless.
For a crowd, plan plating that balances speed with finesse. Serve in the ramekin for a rustic charm and let each guest spoon directly into the center. If you prefer the inverted look, loosen the sides with a thin knife and invert onto warmed plates so the molten center creates a dramatic pool. Garnish with toasted nuts for crunch or a drizzle of caramel for a boozy depth. If you serve Chocolate Lava Cakes after a heavy meal, keep portions petite and pair them with an espresso or a dessert wine that has balanced acidity to cut the creaminess.
For family nights, I like to offer toppings on the table whipped cream, berries, and a sprinkle of sea salt so everyone customizes their own. Kids love the surprise center, and parents appreciate the quick assembly. No matter how you serve them, Chocolate Lava Cakes have a way of turning a simple dessert into an occasion.
How to store it properly
Chocolate Lava Cakes do best when fresh, so plan to bake close to serving time for the best molten center. If you need to prepare ahead, you can assemble batter and keep it chilled in the refrigerator for up to 24 hours; bring it back to room temperature briefly before baking. You can also freeze filled ramekins: bake partially or leave raw, cover tightly, and freeze for up to one month. For raw-filled ramekins, increase baking time slightly from frozen and monitor for that telltale jig.
If you bake fully and have leftovers, cover baked cakes with plastic wrap and store them in the fridge for up to two days. They won’t retain the optimal molten center after refrigeration, but you can reheat gently in a warm oven to coax some softness back into the center. Avoid the microwave for reheating a whole cake, as it can heat unevenly and make the edges rubbery. Instead, use a low oven (about 300°F) and warm for a few minutes until the center loosens.
When freezing, wrap ramekins individually in foil and place them in a freezer-safe bag to prevent freezer burn. Label with the freeze date, and thaw in the refrigerator overnight before finishing in the oven. These storage strategies give you flexibility when entertaining and let you prep ahead while maintaining the signature Chocolate Lava Cakes experience.
Emma’s Kitchen Tips
From years of catering and family dinners, I gathered practical tricks that make Chocolate Lava Cakes reliable under pressure. First, use room-temperature eggs; they incorporate more smoothly and help create a glossy batter. Second, always set a timer and check at the lower end of the bake time the difference of a minute or two changes the interior from molten to just-cakey. Third, test one ramekin first if you’re unfamiliar with your oven’s hot spots.
For flavor, I often fold in a pinch of espresso powder to amplify the chocolate without adding a coffee taste, or add a dash of orange zest for brightness. If you anticipate serving many, prepare batter in a large bowl and portion into ramekins; you can chill the filled ramekins and pop them into the oven when guests arrive. If you like a more dramatic presentation, sprinkle coarse sea salt or a few toasted hazelnuts on top just before serving to balance sweetness and add crunch.
If you enjoy exploring texture swaps, try replacing half the butter with browned butter for a nutty undertone, or stir in a spoonful of mascarpone for a silkier center. For low-sugar approaches, use a high-quality dark chocolate with less sugar and compensate with a lightly sweetened fruit topping. I often reference straightforward make-ahead breakfast items when planning menus; for instance, my protein pancakes recipe shows how planning and small adjustments create big payoff across meals. These tips come from catering demands and family practicality, and they make Chocolate Lava Cakes easier and more consistent at home.
Make it your own
Chocolate Lava Cakes invite creativity. Start with the base method, then personalize flavors and garnishes. For a citrus note, fold in a teaspoon of finely grated orange zest or serve with a spoonful of marmalade on the plate. For a nutty twist, press a whole toasted hazelnut or almond into the center before baking; it creates a fun surprise when you spoon into the middle. Try different chocolate types: a high-cacao bar gives intensity, while a milk chocolate blend yields a sweeter, creamier pool.
You can also explore size and format. Make mini lava cakes in muffin tins for bite-sized party treats, or scale up and serve a larger skillet version that reveals a communal molten center for sharing. For a boozy adult twist, stir a tablespoon of bourbon, rum, or coffee liqueur into the batter before baking. If you want a lighter version, swap half the butter for applesauce and use a bit less sugar, then add tart fruit to the plate to keep balance.
Dietary swaps work too: use gluten-free flour blends in place of all-purpose flour to make the dessert gluten-free, and experiment with dairy-free chocolate and plant-based butter for a vegan-friendly option (use an egg replacer or aquafaba technique if avoiding eggs). Keep the core approach consistent glossy melted chocolate, tempered eggs, a small binding of flour and you can confidently make Chocolate Lava Cakes that suit your taste and dietary needs.

Frequently asked questions
Q: How do I know when Chocolate Lava Cakes are done?
A: Look for a firm outer edge and a slightly jiggly center. The cakes should spring back lightly when nudged. Check at the shorter end of the bake time and add small increments if necessary. Use one test ramekin if you’re unsure about your oven’s performance.
Q: Can I prepare the batter ahead of time?
A: Yes. You can mix the batter and keep it in the refrigerator for up to 24 hours, then pour into ramekins and bake when ready. Chilled batter often benefits from an extra minute in the oven. Alternatively, assemble filled ramekins and freeze them for up to a month; thaw overnight and bake, or bake from frozen with added time.
Q: What chocolate should I use for the best result?
A: Use good-quality dark chocolate for a rich flavor; 60–70% cacao works well for balanced sweetness. If you prefer sweeter centers, select a milk chocolate blend, but keep in mind that higher-quality dark chocolate tends to give the most satisfying molten texture and depth.
Q: Can I make Chocolate Lava Cakes without flour?
A: You can reduce the flour slightly, but removing it entirely alters structure; the batter may become too loose to hold shape during baking. For gluten-free versions, substitute an equal amount of a reliable gluten-free flour blend.
Q: How do I serve them for a crowd?
A: Prepare filled ramekins and chill until baking time, or bake in batches and keep warm in a low oven. Offer toppings like ice cream, berries, and whipped cream so guests can customize. A small ramekin portion keeps service quick and portion control easy.
Conclusion
If you want a clear, step-by-step external reference while you bake, I recommend this detailed guide: How to Make Chocolate Lava Cakes – Sally’s Baking. That resource complements the tips here and gives visual cues that help when you test timing in your oven. Enjoy making Chocolate Lava Cakes they create those tiny celebratory moments that bring family and friends together.
Print
Chocolate Lava Cakes
- Total Time: 27 minutes
- Yield: 4 servings
- Diet: Vegetarian
Description
Indulge in rich, molten Chocolate Lava Cakes that feature a cake-like exterior with a gooey chocolate center. Perfect for celebrations and family dinners.
Ingredients
- 4 oz dark chocolate
- 1/2 cup butter
- 1/2 cup sugar
- 2 large eggs
- 2 large egg yolks
- 1/4 cup all-purpose flour
Instructions
- Melt chocolate and butter together in a bowl over simmering water or in the microwave.
- Whisk in sugar until well combined.
- Add eggs and egg yolks, one at a time, whisking until the mixture is smooth.
- Gently fold in flour until just combined.
- Grease ramekins and pour the chocolate batter into each.
- Bake in preheated oven at 425°F for about 12 minutes.
Notes
Serve with vanilla ice cream or a sprinkle of powdered sugar for an elegant touch. Add a drizzle of raspberry coulis for contrast.
- Prep Time: 15 minutes
- Cook Time: 12 minutes
- Category: Dessert
- Method: Baking
- Cuisine: American