
INTRODUCTION
There’s something about the smell of a warm stack early on a weekend that pulls family members from different rooms and starts the day with a chorus of “what’s for breakfast?” Red Velvet Pancakes have that same pull — they’re festive, a little nostalgic, and they make ordinary mornings feel like a celebration. When I flip a bright, cocoa-kissed pancake on the griddle, I’m already imagining the little smiles around our table. That shared moment is what cooking is all about.
I’m Emma, and my kitchen has always been the stage for family life and entertaining. I started my culinary path in Atlanta as a caterer, spending years learning timing, flavor balance, and how to feed a crowd with heart. After sixteen years in food, I shifted my focus to Recipes Vibes full-time, blending those catering instincts with the realities of being a mom of two and a wife of over twenty years. I love teaching readers how to make recipes approachable, and I always encourage adding a personal twist — whether that’s swapping a topping or experimenting with a glaze. That same sense of authenticity and creativity is exactly why I gravitate toward Red Velvet Pancakes: they invite you to both follow a simple method and make it your own. If you love pancake mornings, you might also enjoy my take on lemon ricotta pancakes; they’re another family favorite and an easy way to change up weekend breakfasts: lemon ricotta pancakes. Red Velvet Pancakes bring color and a hint of chocolate to the table in a way that feels special but totally doable for busy families.
Why this recipe matters to me is simple: it pairs the theatrical pop of red with a tender, flavorful bite that my kids ask for at birthday breakfasts and on cozy holiday mornings. These Red Velvet Pancakes are forgiving, quick to make, and they hold up well if you need to keep a batch warm — a carryover from my catering days when timing mattered. I love sharing tweaks that make recipes more flexible: swap the food coloring for beet powder, turn the glaze into a maple drizzle, or add a touch of espresso for depth. That spirit of practical creativity is what I aim to pass along so you can make Red Velvet Pancakes that suit your family’s tastes and traditions.
What makes this recipe special
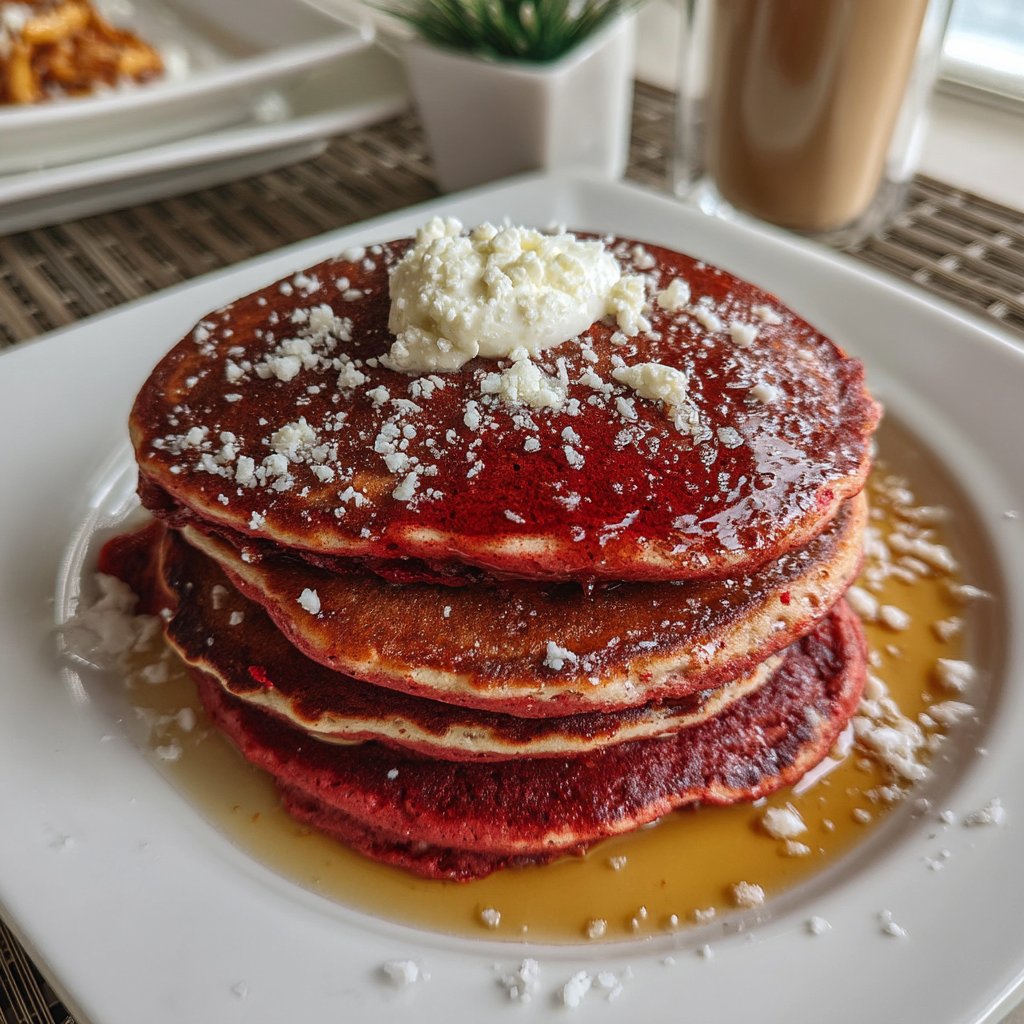
This Red Velvet Pancakes recipe strikes a balance between show-stopping looks and everyday simplicity. Unlike complicated layered cakes, these pancakes deliver the signature cocoa flavor and vibrant color without a long bake time or special equipment. The trick is in the batter: a touch of cocoa provides depth, while buttermilk makes each pancake tender and slightly tangy. The red coloring creates that classic holiday look, but it does more than just color — it turns breakfast into an event. From my catering experience in Atlanta, I learned that presentation matters just as much as flavor. When a stack of Red Velvet Pancakes hits the table with a glossy cream cheese glaze or a drizzle of maple, people take notice. The visual appeal makes them perfect for celebrations, yet the easy technique keeps them realistic for weeknights when you want something extra.
What sets this recipe apart is versatility. You can make them fluffy, thin, or somewhere in between depending on batter thickness and griddle heat. You can also play with mix-ins: a few mini chocolate chips folded into the batter or a sprinkle of chopped nuts on top adds texture. These pancakes freeze well too — cook a batch, layer with parchment, and store in the freezer so you can reheat just what you need. This catering-level convenience is something I rely on when feeding a crowd. Red Velvet Pancakes work equally well as a brunch centerpiece or a kid-friendly treat; they’re fun to assemble for special mornings and straightforward enough to make on busy weekends. The combination of approachable ingredients, beautiful color, and flexible serving options is why this version of Red Velvet Pancakes keeps showing up on our table year after year.
How to prepare Red Velvet Pancakes
Making Red Velvet Pancakes is all about straightforward technique and gentle handling. Start by combining dry ingredients and then whisk together the wet ones; mixing the two until just combined preserves tenderness. Use a medium-hot griddle to cook them evenly — too hot and they’ll brown outside before cooking through, too cool and they won’t get that light rise. I like using a 1/4-cup measure for each pancake to keep sizes consistent; consistency helps with stacking and serving, especially if you’re feeding little ones. Another small catering trick I use is to keep the cooked pancakes on a low oven rack (about 200°F) on a sheet pan lined with parchment to keep them warm without steaming.
Because the batter includes cocoa, the color will have a warm, rusty tone before the red coloring goes in. Add your food coloring a little at a time until you reach your desired hue — some prefer a subtle blush, others want a vibrant carnival red. For families who prefer natural ingredients, beet powder or concentrated beet juice can give you color with a milder label claim. As you flip the pancakes, look for small bubbles across the surface as the cue to turn them. With practice, you’ll develop an eye for the exact moment. These Red Velvet Pancakes reward a relaxed approach; resist overmixing and overcooking so they stay tender and moist. In my years catering plus parenting, the simple, repeatable steps below have made this a reliable favorite any time we want a breakfast that feels special.
Ingredients
Start with pantry basics and a couple of simple touches for color and tang. These amounts yield batter for about 10–12 medium pancakes, depending on size.
- 1 ½ cups all-purpose flour
- 2 tablespoons cocoa powder
- 1 tablespoon red food coloring
- 1 ¼ cups buttermilk
- Maple syrup or cream cheese glaze for serving
These ingredients make it easy to assemble the batter quickly and get a griddle going. If you’re dairy-free, swap the buttermilk for a mixture of non-dairy milk and a teaspoon of vinegar, though texture will be slightly different. The cocoa powder gives depth so the red doesn’t taste purely sweet, and the buttermilk keeps the pancakes tender. If you’re curious about colorful pancake variations, try my green pancakes recipe for a fun, kid-friendly alternative; the technique is similar, so once you’ve mastered the Red Velvet Pancakes method, other playful colors are easy to explore.
Instructions
Follow these numbered steps to build a smooth batter and cook evenly. Each step keeps the process simple and efficient.
- Whisk together all the dry ingredients in a mixing bowl.
- In a separate bowl, combine the buttermilk, red food coloring, and any other wet ingredients.
- Slowly mix the wet ingredients into the dry until you have a smooth batter.
- Preheat a griddle or skillet over medium heat and grease it lightly.
- Pour about ¼ cup of batter onto the hot griddle.
- Cook until bubbles form on the surface, then flip and cook until golden brown.
- Stack the pancakes on a plate and top with syrup or cream cheese glaze.
These clear steps come from a lifetime of making food that looks good and serves well under pressure. If you plan to feed a crowd, double the batter and keep pancakes warm on a sheet pan in a low oven. For toppings, cream cheese glaze gives a classic pairing that echoes the flavors of a red velvet cake, while maple syrup provides a simpler, beloved route. Making Red Velvet Pancakes can be a communal activity — pour rounds while kids or guests top with berries, nuts, or a dusting of powdered sugar.
Serving ideas
When it comes to serving Red Velvet Pancakes, presentation elevates the experience. A tall stack with a silky cream cheese drizzle looks dramatic and feeds right into that cake-like feel, while individual pancakes topped with whipped cream and fresh berries keep portions lighter. For a brunch buffet, offer bowls of sliced strawberries, toasted pecans, and chocolate chips so guests can customize. If you want to pair flavors, consider offering a side that contrasts the sweetness: a tart fruit compote or citrusy yogurt complements the cocoa and richness of the pancakes.
For family breakfasts, get kids involved in the finishing touches — they love scattering toppings and arranging stacks, and that participation makes the meal memorable. If you’re serving Red Velvet Pancakes for a party, place a warm syrup dispenser and a chilled cream cheese glaze bowl on the table so people can choose. For an indulgent twist, top with a scoop of vanilla ice cream and a drizzle of warm chocolate sauce for a dessert-style breakfast. If you’re experimenting with flavors, pair the pancakes with something chocolaty yet bright, like my chocolate-covered strawberry brownies served in small squares alongside for an extra-special brunch offering.
Storage tips
Think ahead: Red Velvet Pancakes store and reheat beautifully, which makes them perfect for busy households. To freeze, cool pancakes completely, then layer them between sheets of parchment in a freezer-safe container. Reheat individual pancakes in a toaster or on a skillet from frozen for a quick treat. For short-term storage, stack pancakes with a sheet of parchment between layers and refrigerate in an airtight container for up to three days. When reheating, use low heat to preserve tenderness.
If you make a large batch, consider portioning before freezing so you can reheat exactly what you need. The cream cheese glaze is best made fresh, but you can prepare a thicker glaze and store it for a day or two; thin it with a splash of milk or cream when ready to serve. These tricks are ones I picked up during my catering days in Atlanta — they help keep flavor and texture consistent whether you’re feeding a family or a crowd. No matter how you store them, Red Velvet Pancakes retain their special charm, so you can enjoy vibrant breakfast moments any morning.
Emma’s Kitchen Tips
Over the years I’ve gathered a few reliable habits that make Red Velvet Pancakes shine. First, measure the flour by spooning it into the cup and leveling — that prevents dense pancakes. Let your batter rest five minutes before cooking to hydrate the flour and stabilize bubbles. Use a nonstick griddle or a well-seasoned skillet and a light swipe of oil for the best surface. If you like a fudgier bite, add a teaspoon of espresso powder to deepen the cocoa notes without adding coffee flavor.
Another tip: adjust the food coloring slowly. You can always add more to reach a brighter hue, but you can’t take it away. For a natural approach, use beet powder dissolved into the wet mix for subtle color and an earthy note. Keep pancakes warm in a 200°F oven on a wire rack over a sheet pan so they stay crisp on the edge and tender inside. These practical tactics have helped me produce consistent results for family breakfasts and catered events alike, and they’ll do the same for your Red Velvet Pancakes. For a little behind-the-scenes technique on fillings and centers, I also share a useful cake pop filling guide that translates well to thinking about texture and balance in batter-based treats.
Fun twists you can try
Make Red Velvet Pancakes your own with small, playful changes. Fold mini white chocolate chips into the batter for pockets of sweet creaminess. Add orange zest to the cream cheese glaze for a citrus lift, or fold mashed banana into part of the batter for a banana-red velvet hybrid that’s great with warm maple. For a more decadent brunch, layer pancakes with whipped mascarpone and fresh raspberries between tiers for a pancake “cake” that feeds a crowd.
You can also experiment with spices: a pinch of cinnamon or cardamom adds warmth, while a dash of cayenne creates a surprising kick that pairs well with chocolate. For a kid-friendly activity, divide the batter and tint each portion a different shade for a rainbow stack — it’s a guaranteed crowd-pleaser. These variations keep Red Velvet Pancakes fresh and exciting, and they invite you to play with flavor while keeping the core technique simple.

Frequently asked questions
Q: Can I make Red Velvet Pancakes without food coloring?
A: Absolutely. You can reduce or skip food coloring and rely on cocoa for a subtle reddish-brown hue, or use beet powder or concentrated beet juice for natural color. Keep in mind that natural colorants may slightly alter flavor and you may need to adjust the amount for visible color. The pancakes will still be delicious — many families prefer a toned-down color but the same tender texture.
Q: How do I make a cream cheese glaze for these pancakes?
A: Combine softened cream cheese with powdered sugar and a splash of milk or cream, then whisk until smooth and pourable. For a tangier glaze, add a little lemon juice. If you prefer a thinner drizzle, warm the glaze slightly and add milk a teaspoon at a time until you reach your desired consistency. The glaze echoes classic red velvet cake flavors and pairs beautifully with the pancakes’ cocoa notes.
Q: Can I prepare the batter ahead of time?
A: You can mix the dry ingredients the night before and whisk together the wet ingredients in the morning, then combine shortly before cooking. If you must make full batter ahead, refrigerate it for up to 24 hours and give it a gentle stir before cooking. Batter may thicken after resting; add a splash of milk to loosen it if needed. For best rise and tenderness, don’t overmix and cook within a day if possible.
Q: What’s the best way to reheat leftover Red Velvet Pancakes?
A: For single pancakes, a toaster or toaster oven works great. For multiple, reheat them in a skillet over medium-low heat or on a sheet pan in a 300°F oven until warmed through. If frozen, reheat directly from frozen using a skillet or toaster if they’re small; add a minute or two to account for frozen interior. This preserves texture better than microwaving, which can make them gummy.
Conclusion
Red Velvet Pancakes are a joyful twist on breakfast that combine showy color, cozy cocoa flavor, and simple technique — perfect for turning ordinary mornings into meaningful memories. For another reliable take on these classic pancakes with a luscious cream cheese glaze, check out Cooking Classy’s Red Velvet Pancakes with Cream Cheese Glaze.
Print
Red Velvet Pancakes
- Total Time: 30 minutes
- Yield: 10–12 medium pancakes
- Diet: Vegetarian
Description
Festive and tender red velvet pancakes, perfect for turning ordinary mornings into special celebrations with a hint of cocoa flavor.
Ingredients
- 1 ½ cups all-purpose flour
- 2 tablespoons cocoa powder
- 1 tablespoon red food coloring
- 1 ¼ cups buttermilk
- Maple syrup or cream cheese glaze for serving
Instructions
- Whisk together all the dry ingredients in a mixing bowl.
- In a separate bowl, combine the buttermilk, red food coloring, and any other wet ingredients.
- Slowly mix the wet ingredients into the dry until you have a smooth batter.
- Preheat a griddle or skillet over medium heat and grease it lightly.
- Pour about ¼ cup of batter onto the hot griddle.
- Cook until bubbles form on the surface, then flip and cook until golden brown.
- Stack the pancakes on a plate and top with syrup or cream cheese glaze.
Notes
For dairy-free, swap the buttermilk with non-dairy milk and a teaspoon of vinegar. These pancakes freeze well; layer with parchment for easy reheating.
- Prep Time: 15 minutes
- Cook Time: 15 minutes
- Category: Breakfast
- Method: Grilling
- Cuisine: American