
INTRODUCTION
Why this recipe stands out
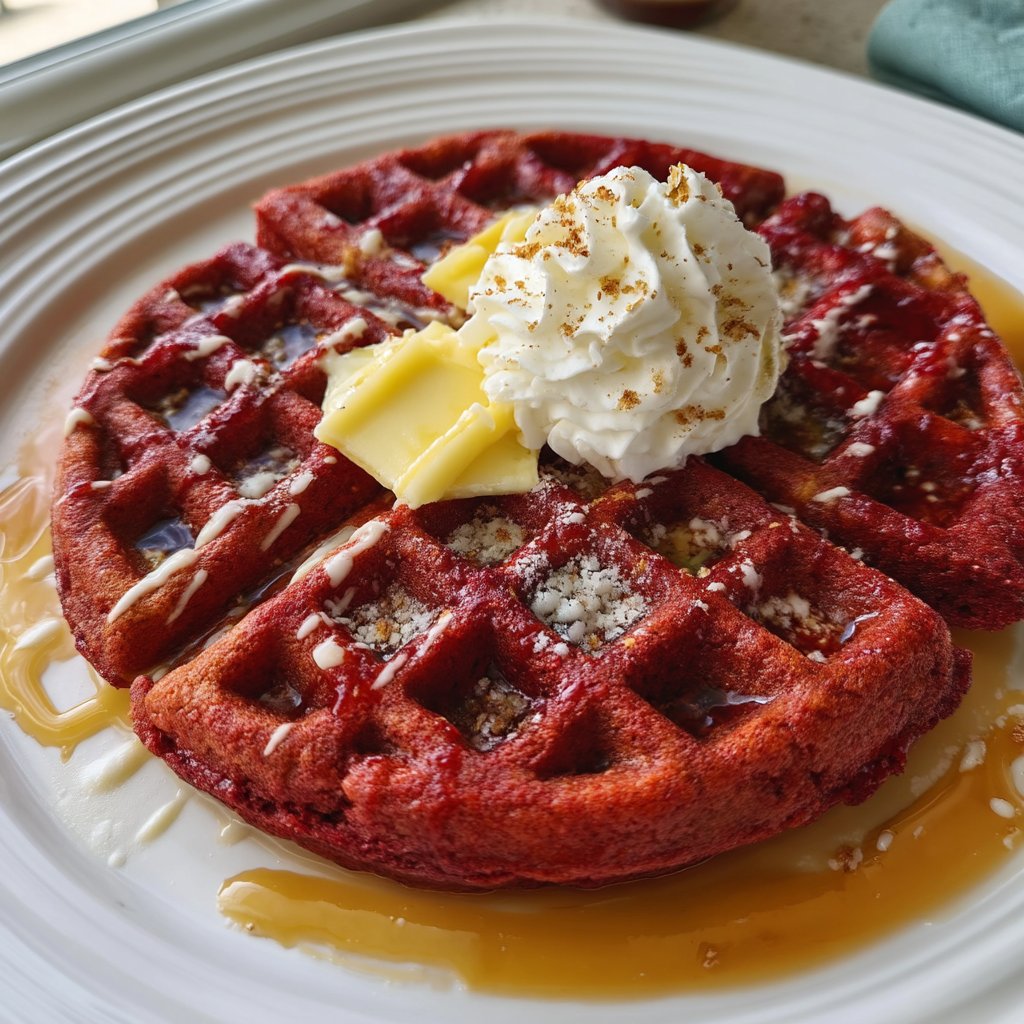
There’s something about cozy kitchens, syrupy sweetness, and the joy of a weekend morning that pulls people to the table. Red Velvet Waffles turn ordinary brunch into a celebration: their tender texture, subtle cocoa notes, and that show-stopping crimson color make conversations stretch longer and plates come back for seconds. I’ve seen quick weekday breakfasts become slow, laughter-filled gatherings just by bringing a stack of warm Red Velvet Waffles to the center of the table.
I’m Emma, and I built Recipes Vibes from the kind of kitchen that hums with family life and the clatter of catering delivery boxes. I started as a caterer in Atlanta over 16 years ago, learning to balance flavor, timing, and what people remember most—those little details that turn food into memories. After years of feeding crowds, I shifted my focus to blogging full-time so I could share those tried-and-true ideas with home cooks. As a mom of two and a wife of more than 20 years, my kitchen still rules our house: after-school snacks, big holiday spreads, and weekend experiments all happen there. I love following recipes, but I also encourage you to add your twist—swap a topping, fold in a unique flavor, or plate differently to make a family favorite your own. If you adore playful sweets, you might also enjoy my notes on cake pop centers for treats that surprise guests, and my takes on chocolate-covered-strawberry-brownies that pair beautifully with brunch. A touch of nostalgia, a pinch of creativity, and reliable technique are the backbone of every recipe I share, including these Red Velvet Waffles.
How to prepare Red Velvet Waffles
Ingredients
-
Red velvet cake mix
-
Eggs
-
Milk
-
Oil
-
Cream cheese syrup
Instructions
-
Mix batter ingredients until well combined.
-
Preheat your waffle iron.
-
Cook the batter in the waffle iron according to the manufacturer’s instructions.
-
Drizzle with warm cream cheese glaze before serving.
Simple serving suggestions
Serving Red Velvet Waffles feels like hosting a little celebration every time. Start with a warm stack of Red Velvet Waffles, then consider a few complementary toppings that highlight the cake’s mild cocoa and tangy cream cheese flavors. Fresh berries—strawberries and raspberries—bring brightness and a pop of color that complements the red cake base. A dusting of powdered sugar gives a classic look, while a scoop of vanilla ice cream transforms the waffles into a dessert-worthy treat that kids adore. For a brunch crowd, I love setting up a small toppings bar with whipped cream, chopped nuts, berry compote, and a jar of warm cream cheese syrup so guests can customize their plate.
For an elegant twist, add a smear of mascarpone or ricotta between two waffles to create a waffle sandwich; it feels decadent without being overly sweet. If you like pairing textures, top the Red Velvet Waffles with candied pecans or toasted coconut for crunch. For a chocolate boost, a drizzle of melted dark chocolate or a scattering of mini chocolate chips works beautifully. If you’re hosting a themed brunch—say, a Valentine’s morning—use heart-shaped waffle irons and pair Red Velvet Waffles with chocolate-covered strawberries to echo the color story; my chocolate-covered-strawberry-brownies post has great ideas that match the vibe. Keeping a few easy garnishes on hand—fresh fruit, nuts, and a simple warm glaze—lets you plate quickly and create something memorable.
How to store it properly
Leftover Red Velvet Waffles store and reheat really well, which makes them a perfect make-ahead option for busy mornings. Once the waffles cool to room temperature, place sheets of parchment between each waffle and stack them in an airtight container or heavy-duty freezer bag. In the refrigerator, they keep for up to three days; in the freezer, they last up to two months. When you’re ready to enjoy them again, the toaster or an oven set to 350°F restores crisp edges and a warm center wonderfully—reheating from frozen takes about 8 to 10 minutes in a toaster oven or 12–15 minutes in a conventional oven.
If you plan to freeze stacks, wrap them tightly in plastic before popping into a freezer bag to prevent freezer burn. For best texture, avoid microwaving unless you’re in a hurry; microwaving can make waffles soft and a bit chewy. Instead, re-crisp them on a sheet pan for 5–8 minutes or in an air fryer for a few minutes at medium heat. When storing any leftover glaze or cream cheese syrup, keep it in a sealed jar in the fridge for up to a week—gently warm it before drizzling over your reheated Red Velvet Waffles. I also like separating toppings—store fruit compotes and crunchy nuts separately so textures remain just right.
Emma’s Kitchen Tips
From my years catering in Atlanta and cooking for my family, I’ve learned small adjustments make a big difference with Red Velvet Waffles. First, don’t overmix the batter; a few lumps are fine and help the waffles stay light. If you want extra richness, substitute half the milk with buttermilk—its acidity brightens the flavor and pairs beautifully with cream cheese syrup. To intensify the red hue without artificial colors, a splash of beet juice works, but add sparingly to maintain balance. If you need more lift, separate eggs and beat the whites until soft peaks form, folding them into the batter for extra fluff.
When cooking, spray the waffle iron lightly with oil to ensure easy release and even browning. Check your waffle iron’s heat settings; some irons run hotter, so adjust cook time accordingly to avoid scorching the edges. For a special twist, fold a teaspoon of instant espresso into the batter to amplify the cocoa notes without making the waffles taste like coffee. If you want to keep things kid-friendly, top your Red Velvet Waffles with colorful sprinkles or a simple powdered sugar dusting. Also, if you love texture variety, sprinkle chopped pink velvet cookie crumbs on top; my pink velvet cookies recipe gives an idea for homemade crumbs that pair wonderfully with these waffles.
Make it your own
The best part about this Red Velvet Waffles recipe is how easy it is to personalize. Turn the waffles into a sandwich by layering mascarpone and sliced strawberries between two warm waffles for a grown-up treat. For breakfast-for-dinner nights, serve Red Velvet Waffles alongside crispy bacon or a maple sausage for that sweet-and-savory contrast families love. If you want to go fancy, build a short-stack with alternating layers of whipped cream and a bright berry compote, then top with a drizzle of warm cream cheese syrup for shine.
To add seasonal flair, fold in spices for fall—cinnamon or a pinch of nutmeg pairs subtly with the cake mix base. For a brunch that doubles as dessert, top the Red Velvet Waffles with lemon curd and a few mint leaves for a flavor play that surprises guests. If you’re prepping for a crowd, make waffles ahead and store them frozen; reheat in batches so everyone gets warm, crisp waffles. And don’t be afraid to borrow ideas from other treats—crumbled cake pop centers make a playful crunchy garnish, and pairing these waffles with elements from my cake pop filling notes can create a fun dessert buffet.

Frequently asked questions
Q: Can I make Red Velvet Waffles from scratch instead of using cake mix?
A: Yes, you can make Red Velvet Waffles from scratch by combining flour, sugar, cocoa powder, baking powder, salt, eggs, milk (or buttermilk), butter or oil, vanilla, and red food coloring. The mix-and-bake approach with a cake mix gives consistent results and saves time, which is great for busy mornings. If you choose scratch, use a recipe that balances acidity and cocoa so the waffles keep that classic red velvet character.
Q: How do I get the glaze to the right consistency for drizzling?
A: Warm the cream cheese syrup gently over low heat or in short bursts in the microwave, stirring often. If it’s too thick, thin with a teaspoon of milk at a time until it reaches a pourable consistency. If it’s too thin, whisk in a little powdered sugar until you reach the desired thickness. Drizzle immediately over warm waffles so the glaze creates glossy ribbons and a luscious mouthfeel on each bite.
Q: Can I freeze the cream cheese glaze?
A: I don’t recommend freezing cream cheese glaze; dairy-based glazes can change texture after thawing. Instead, store the glaze in the refrigerator for up to a week and gently warm before use. If you want a freezer-friendly option, prepare a powdered sugar glaze (simple sugar and milk) that freezes better and still tastes delightful on Red Velvet Waffles.
Q: What should I serve with Red Velvet Waffles for a crowd?
A: For a crowd, provide a toppings station with warm cream cheese syrup, fresh berries, whipped cream, chopped nuts, maple syrup, and a few chocolate options. Offer a savory side like bacon or breakfast sausage for balance, and plate stacks of Red Velvet Waffles buffet-style so guests can build their perfect plate.
Conclusion
If you want to explore another take on this idea, Kevin’s detailed version is a great reference: Red Velvet Waffles w/ Cream Cheese Glaze | Kevin is Cooking.
Print
Red Velvet Waffles
- Total Time: 25 minutes
- Yield: 4 servings
- Diet: Vegetarian
Description
Indulge in these delightful Red Velvet Waffles, perfect for a cozy brunch with their tender texture and sweet cream cheese syrup.
Ingredients
- 1 package red velvet cake mix
- 2 large eggs
- 1 cup milk
- 1/4 cup oil
- Cream cheese syrup (for drizzling)
Instructions
- Mix batter ingredients until well combined.
- Preheat your waffle iron.
- Cook the batter in the waffle iron according to the manufacturer’s instructions.
- Drizzle with warm cream cheese glaze before serving.
Notes
For extra richness, substitute half the milk with buttermilk. Don’t overmix the batter; lumps are fine for light waffles.
- Prep Time: 10 minutes
- Cook Time: 15 minutes
- Category: Breakfast
- Method: Waffle Maker
- Cuisine: American